Link fast: Improve build and launch times
1. Hi, I'm Nick Kledzik, lead Engineer on Apple's Linker team.
▶ 안녕하세요. 저는 Apple Linker 팀의 수석 엔지니어인 Nick Kledzik입니다.
2. Today, I'd like to share with you how to link fast.
▶ 오늘은 빠르게 link하는 방법에 대해 알려드리고자 합니다.
3. I'll tell you what Apple has done to improve linking, as well as help you understand what actually happens during linking so that you can improve your app's link performance.
▶ Apple이 링크를 개선하기 위해 무엇을 했는지 알려 드리고 링크 중에 실제로 어떤 일이 발생하는지 이해하여 앱의 링크 성능을 향상시킬 수 있도록 도와드리겠습니다.
4. So what is linking? You've written code, but you also use code that someone else wrote in the form of a library or a framework.
▶ 그래서 Link이란 무엇입니까? 코드를 작성하지만, 다른 사람이 라이브러리나 프레임워크의 형태로 작성한 코드도 사용합니다.
5. In order for your code to use those libraries, a linker is needed.
▶ 코드에서 이러한 라이브러리를 사용하려면 링커가 필요합니다.
6. Now, there are actually two types of linking.
▶ 이제 실제로 두 가지 유형의 Linking이 있습니다.
7. There is "static linking", which happens when you build your app.
▶ 앱을 빌드할 때 발생하는 "정적 연결"이 있습니다.
8. This can impact how long it takes for your app to build and how big your app ends up being.
▶ 이는 앱을 빌드하는 데 걸리는 시간과 앱의 크기에 영향을 줄 수 있습니다.
9. And there is "dynamic linking".
▶ 그리고 "동적 연결"이 있습니다.
10. This happens when your app is launched.
▶ 이것은 앱이 실행될 때 발생합니다.
11. This can impact how long your customers have to wait for your app to launch.
▶ 이는 고객이 앱이 실행될 때까지 기다려야 하는 시간에 영향을 줄 수 있습니다.
12. In this session I'll be talking about both static and dynamic linking.
▶ 이 세션에서는 정적 연결과 동적 연결에 대해 이야기하겠습니다.
13. First, I'll define what static linking is and where it came from, with some examples.
▶ 먼저 몇 가지 예를 들어 정적 연결이 무엇이며 어디서 왔는지 정의하겠습니다.
14. Next, I'll unveil what is new in ld64, Apple's static linker.
▶ 다음으로 Apple의 정적 링커인 ld64의 새로운 기능을 공개하겠습니다.
15. Then, with this background on static linking, I'll detail best practices for static linking.
▶ 그런 다음 정적 연결에 대한 이 배경 지식을 바탕으로, 정적 연결에 대한 모범 사례를 자세히 설명하겠습니다.
16. The second half of this talk will cover dynamic linking.
▶ 이 강연의 후반부에서는 동적 연결을 다룰 것입니다.
17. I'll show what dynamic linking is and where it came from, and what happens during dynamic linking.
▶ 동적 연결이 무엇이며 어디에서 왔는지, 동적 연결 중에 어떤 일이 발생하는지 보여 드리겠습니다.
18. Next, I'll reveal what is new in dyld this year.
▶ 다음으로, 올해 dyld의 새로운 소식을 알려드리겠습니다.
19. Then, I'll talk about what you can do to improve your app's dynamic link time performance.
▶ 그런 다음, 앱의 동적 연결 시간 성능을 향상시키기 위해 무엇을 할 수 있는지 이야기하겠습니다.
20. And lastly, we'll wrap up with two new tools that will help you peek behind the curtains.
▶ 마지막으로, 커튼 뒤를 엿보는 데 도움이 되는 두 가지 새로운 도구로 마무리하겠습니다.
21. You'll be able to see what is in your binaries, and what is happening during dynamic linking.
▶ 바이너리에 무엇이 있는지, 동적 연결 중에 어떤 일이 일어나는지 볼 수 있습니다.
22. To understand static linking, let's go way back to when it all started.
▶ 정적 연결을 이해하기 위해 모든 것이 시작된 때로 돌아가 보겠습니다.
23. In the beginning, programs were simple and there was just one source file.
▶ 처음에는 프로그램이 단순했고 소스 파일이 하나뿐이었습니다.
24. Building was easy.
▶ 빌드는 쉬웠습니다.
25. You just ran the compiler on your one source file and it produced the executable program.
▶ 하나의 소스 파일에서 컴파일러를 실행하고 ,실행 가능한 프로그램을 생성했습니다.
26. But having all your source code in one file did not scale.
▶ 그러나 하나의 파일에 모든 소스 코드를 포함하는 것은 확장되지 않았습니다.
27. How do you build with multiple source files? And this is not just because you don't want to edit a large text file.
▶ 여러 소스 파일로 어떻게 빌드합니까? 큰 텍스트 파일을 편집하고 싶지 않기 때문만은 아닙니다.
28. The real savings is not re-compiling every function, every time you build.
▶ 실제 절약은 빌드할 때마다 모든 기능을 다시 컴파일하는 것이 아닙니다.
29. What they did was to split the compiler into two parts.
▶ 그들이 한 것은 컴파일러를 두 부분으로 나누는 것이었습니다.
30. The first part compiles source code to a new intermediate "relocatable object" file.
▶ 첫 번째 부분은 소스 코드를 새로운 중간 "재배치 가능한 개체" 파일로 컴파일합니다.
31. The second part reads the relocatable .o file and produces an executable program.
▶ 두 번째 부분은 재배치 가능한 .o 파일을 읽고 실행 가능한 프로그램을 생성합니다.
32. We now call the second part 'ld', the static linker.
▶ 이제 두 번째 부분을 정적 링커인 'ld'라고 부릅니다.
33. So now you know where static linking came from.
▶ 이제 정적 링크가 어디에서 왔는지 알 수 있습니다.
34. As software evolved, soon people were passing around .o files.
▶ 소프트웨어가 발전함에 따라 곧 사람들은 .o 파일을 전달했습니다.
35. But that got cumbersome.
▶ 하지만 번거로워졌습니다.
36. Someone thought, "Wouldn't it be great if we could package up a set of .o files into a 'library'?". At the time the standard way to bundle files together was with the archiving tool 'ar'.
▶ 누군가는 ".o 파일 세트를 '라이브러리'로 패키징할 수 있다면 좋지 않을까요?"라고 생각했습니다. 당시 파일을 함께 묶는 표준 방법은 보관 도구 'ar'를 사용하는 것이었습니다.
37. It was used for backups and distributions.
▶ 이것은 백업 및 배포에 사용되었습니다.
38. So the workflow became this.
▶ 그래서 워크플로는 이렇게 되었습니다.
39. You could 'ar' up multiple .o files into an archive, and the linker was enhanced to know how to read .o files directly out of an archive file.
▶ 여러 .o 파일을 아카이브로 'ar'할 수 있으며, 링커는 아카이브 파일에서 직접 .o 파일을 읽는 방법을 알 수 있도록 향상되었습니다.
40. This was a great improvement for sharing common code.
▶ 이것은 공통 코드를 공유하기 위한 큰 개선 사항이었습니다.
41. At the time it was just called a library or an archive.
▶ 당시에는 그냥 라이브러리나 아카이브라고 불렀습니다.
42. Today, we call it a static library.
▶ 오늘날 우리는 이것을 정적 라이브러리라고 부릅니다.
43. But now the final program was getting big because thousands of functions from these libraries were copied into it, even if only a few of those functions were used.
▶ 그러나 이제 최종 프로그램은 이러한 라이브러리에서 수천 개의 함수가 복사되었기 때문에, 거대해지고 있었습니다. 해당 함수 중 일부만 사용된 경우에도 마찬가지입니다.
44. So a clever optimization was added.
▶ 그래서 영리한 최적화가 추가되었습니다.
45. Instead of having the linker use all the .o files from the static library, the linker would only pull .o files from a static library if doing so would resolve some undefined symbol.
▶ 링커가 정적 라이브러리의 모든 .o 파일을 사용하도록 하는 대신, 링커는 정의되지 않은 기호가 해결하는 정적 라이브러리의 .o 파일만 가져옵니다.
46. That meant someone could build a big libc.a static library, which contained all the C standard library functions.
▶ 이는 누군가가 모든 C 표준 라이브러리 기능을 포함하는 큰 libc.a 정적 라이브러리를 구축할 수 있음을 의미했습니다.
47. Every program could link with the one libc.a, but each program only got the parts of libc that the program actually needed.
▶ 모든 프로그램은 하나의 libc.a와 연결할 수 있지만, 각 프로그램은 프로그램이 실제로 필요로 하는 libc의 일부만 얻었습니다.
48. And we still have that model today.
▶ 그리고 우리는 오늘날에도 그 모델을 가지고 있습니다.
49. But the selective loading from static libraries is not obvious and trips up many programmers.
▶ 그러나 정적 라이브러리에서 선택적으로 로드하는 것은 분명하지 않으며, 많은 프로그래머를 곤경에 빠뜨립니다.
50. To make the selective loading of static libraries a little clearer, I have a simple scenario.
▶ 정적 라이브러리의 선택적 로드를 좀 더 명확하게 하기 위해 간단한 시나리오가 있습니다.
51. In main.c, there's a function called "main" that calls a function "foo".
▶ main.c에는 "foo" 함수를 호출하는 "main"이라는 함수가 있습니다.
52. In foo.c, there is foo which calls bar.
▶ foo.c에는 bar를 호출하는 foo가 있습니다.
53. In bar.c, there is the implementation of bar but also an implementation of another function which happens to be unused.
▶ bar.c에는 bar의 구현이 있지만, 사용되지 않는 다른 함수의 구현도 있습니다.
54. Lastly, in baz.c, there is a function baz which calls a function named undef.
▶ 마지막으로 baz.c에는 undef라는 함수를 호출하는 baz 함수가 있습니다.
55. Now we compile each to its own .o file.
▶ 이제 각각을 자체 .o 파일로 컴파일합니다.
56. You'll see foo, bar, and undef don't have gray boxes because they are undefined.
▶ foo, bar, undef는 정의되지 않았기 때문에 회색 상자가 없는 것을 볼 수 있습니다.
57. That is, a use of a symbol and not a definition.
▶ 즉, 정의가 아닌, 기호의 사용입니다.
58. Now, let's say you decide to combine bar.o and baz.o into a static library.
▶ 이제 bar.o와 baz.o를 정적 라이브러리로 결합하기로 결정했다고 가정해 보겠습니다.
59. Next, you link the two .o files and the static library.
▶ 다음으로 두 개의 .o 파일과 정적 라이브러리를 연결합니다.
60. Let's step through what actually happens.
▶ 실제로 일어나는 일을 단계별로 살펴보겠습니다.
61. First, the linker works through the files in command line order.
▶ 첫째, 링커는 명령줄 순서로 파일을 통해 작동합니다.
62. The first it finds is main.o.
▶ 가장 먼저 찾은 것은 main.o입니다.
63. It loads main.o and finds a definition for "main", shown here in the symbol table.
▶ main.o를 로드하고 여기 기호 테이블에 표시된 "main"에 대한 정의를 찾습니다.
64. But also finds that main has an undefined "foo".
▶ 그러나 또한 main에는 정의되지 않은 "foo"가 있습니다.
65. The linker then parses the next file on the command line which is foo.o.
▶ 그런 다음 링커는 명령줄에서 foo.o인 다음 파일을 구문 분석합니다.
66. This file adds a definition of "foo".
▶ 이 파일은 "foo"의 정의를 추가합니다.
67. That means foo is no longer undefined.
▶ 즉, foo는 더 이상 정의되지 않습니다.
68. But loading foo.o also adds a new undefined symbol for "bar".
▶ 그러나 foo.o를 로드하면, "bar"에 대한 새로운 정의되지 않은 기호도 추가됩니다.
69. Now that all the .o files on the command line have been loaded, the linker checks if there are any remaining undefined symbols.
▶ 이제 명령줄의 모든 .o 파일이 로드되었으므로, 링커는 정의되지 않은 기호가 남아 있는지 확인합니다.
70. In this case "bar" remains undefined, so the linker starts looking at libraries on the command line to see if a library will satisfy that missing undefined symbol "bar".
▶ 이 경우 "bar"는 정의되지 않은 상태로 남아 있으므로 링커는 라이브러리가 누락된 정의되지 않은 기호 "bar"를 충족하는지 확인하기 위해 명령줄에서 라이브러리를 살펴보기 시작합니다.
71. The linker finds that bar.o in the static library defines the symbol "bar".
▶ 링커는 정적 라이브러리의 bar.o가 "bar" 기호를 정의한다는 것을 찾습니다.
72. So the linker loads bar.o out of the archive.
▶ 따라서 링커는 아카이브에서 bar.o를 로드합니다.
73. At that point there are no longer any undefined symbols, so the linker stops processing libraries.
▶ 이 시점에서 더 이상 정의되지 않은 기호가 없으므로 링커는 라이브러리 처리를 중지합니다.
74. The linker moves on to its next phase, and assigns addresses to all the functions and data that will be in the program.
▶ 링커는 다음 단계로 이동하여 프로그램에 포함될 모든 기능과 데이터에 주소를 할당합니다.
75. Then it copies all the functions and data to the output file.
▶ 그런 다음 모든 기능과 데이터를 출력 파일에 복사합니다.
76. Et voila! You have your output program.
▶ 엣 짜잔! 출력 프로그램이 있습니다.
77. Notice that baz.o was in the static library but not loaded into the program.
▶ baz.o는 정적 라이브러리에 있었지만 프로그램에 로드되지 않았습니다.
78. It was not loaded because the way the linker selectively loads from static libraries.
▶ 링커가 정적 라이브러리에서 선택적으로 로드하는 방식 때문에 로드되지 않았습니다.
79. This is non-obvious, but the key aspect of static libraries.
▶ 이것은 분명하지 않지만 정적 라이브러리의 핵심 측면입니다.
80. Now you understand the basics of static linking and static libraries.
▶ 이제 정적 링크 및 정적 라이브러리의 기본 사항을 이해했습니다.
81. Let's move on to recent improvements on Apple's static linker, known as ld64.
▶ ld64로 알려진 Apple의 정적 링커에 대한 최근 개선 사항으로 넘어가 보겠습니다.
82. By popular demand, we spent some time this year optimizing ld64.
▶ 대중적인 요구에 따라 올해 ld64를 최적화하는 데 시간을 보냈습니다.
83. And this year's linker is.
▶ 그리고 올해의 링커는.
84. twice as fast for many projects.
▶ 많은 프로젝트에서 두 배 빠릅니다.
85. How did we do this? We now make better use of the cores on your development machine.
▶ 우리는 이것을 어떻게 했는가? 이제 개발 시스템에서 코어를 더 잘 사용합니다.
86. We found a number of areas where we could use multiple cores to do linker work in parallel.
▶ 여러 코어를 사용하여 링커 작업을 병렬로 수행할 수 있는 여러 영역을 찾았습니다.
87. That includes copying content from the input to the output file, building the different parts of LINKEDIT in parallel, and changing the UUID computation and codesigning hashes to be done in parallel.
▶ 여기에는 입력에서 출력 파일로 콘텐츠 복사, LINKEDIT의 다른 부분을 병렬로 빌드, UUID 계산 및 코드 서명 해시를 병렬로 변경하는 작업이 포함됩니다.
88. Next, we improved a number of algorithms.
▶ 다음으로 여러 알고리즘을 개선했습니다.
89. Turns out the exports-trie builder works really well if you switch to use C++ string_view objects to represent the string slices of each symbol.
▶ export-trie 빌더는 C++ string_view 개체를 사용하여 각 기호의 문자열 조각을 나타내도록 전환하면 정말 잘 작동합니다.
90. We also used the latest crypto libraries which take advantage of hardware acceleration when computing the UUID of a binary, and we improved other algorithms too.
▶ 또한 바이너리의 UUID를 계산할 때 하드웨어 가속을 활용하는 최신 암호화 라이브러리를 사용하고 다른 알고리즘도 개선했습니다.
91. While working on improving linker performance, we noticed configuration issues in some apps that impacted link time.
▶ 링커 성능을 개선하기 위해 노력하는 동안, 링크 시간에 영향을 미치는 일부 앱의 구성 문제를 발견했습니다.
92. Next, I'll talk about what you can do in your project to improve link time.
▶ 다음으로 링크 시간을 개선하기 위해 프로젝트에서 무엇을 할 수 있는지 이야기하겠습니다.
93. I'll cover five topics.
▶ 5가지 주제를 다루겠습니다.
94. First, whether you should use static libraries.
▶ 첫째, 정적 라이브러리를 사용해야 하는지 여부입니다.
95. And then three little known options that have a big effect on your link time.
▶ 그리고 링크 시간에 큰 영향을 미치는 잘 알려지지 않은 세 가지 옵션이 있습니다.
96. Finally, I'll discuss some static linking behavior that might surprise you.
▶ 마지막으로 여러분을 놀라게 할 수 있는 몇 가지 정적 연결 동작에 대해 설명하겠습니다.
97. The first topic is if you are actively working on a source file that builds into a static library, you've introduced a slowdown to your build time.
▶ 첫 번째 주제는 정적 라이브러리로 빌드되는 소스 파일에서 적극적으로 작업하는 경우, 빌드 시간이 느려지는 것입니다.
98. Because after the file is compiled, the entire static library has to be rebuilt, including its table of contents.
▶ 파일이 컴파일된 후 목차를 포함하여 전체 정적 라이브러리를 다시 빌드해야 하기 때문입니다.
99. This is just a lot of extra I/O.
▶ 이것은 단지 많은 추가 I/O일 뿐입니다.
100. Static libraries make the most sense for stable code.
▶ 정적 라이브러리는 안정적인 코드에 가장 적합합니다.
101. That is, code not being actively changed.
▶ 즉, 코드가 활발히 변경되지 않습니다.
102. You should consider moving code under active development out of a static library to reduce build time.
▶ 빌드 시간을 줄이려면 활성 개발 중인 코드를 정적 라이브러리 밖으로 이동하는 것을 고려해야 합니다.
103. Earlier we showed the selective loading from archives.
▶ 이전에 아카이브에서 선택적 로딩을 보여주었습니다.
104. But a downside of that is that it slows down the linker.
▶ 그러나 그것의 단점은 링커가 느려진다는 것입니다.
105. That is because to make builds reproducible and follow traditional static library semantics, the linker has to process static libraries in a fixed, serial order.
▶ 이는 빌드를 재현 가능하게 만들고, 기존의 정적 라이브러리 의미를 따르기 위해 링커가 고정된 직렬 순서로 정적 라이브러리를 처리해야 하기 때문입니다.
106. That means some of the parallelization wins of ld64 cannot be used with static libraries.
▶ 즉, ld64의 일부 병렬화 성공은 정적 라이브러리와 함께 사용할 수 없습니다.
107. But if you don't really need this historical behavior, you can use a linker option to speed up your build.
▶ 그러나 이 기록 동작이 실제로 필요하지 않은 경우, 링커 옵션을 사용하여 빌드 속도를 높일 수 있습니다.
108. That linker option is called "all load".
▶ 해당 링커 옵션을 "모든 로드"라고 합니다.
109. It tells the linker to blindly load all .o files from all static libraries.
▶ 모든 정적 라이브러리에서 모든 .o 파일을 맹목적으로 로드하도록 링커에 지시합니다.
110. This is helpful if your app is going to wind up selectively loading most of the content from all the static libraries anyways.
▶ 이는 앱이 어쨌든 모든 정적 라이브러리에서 대부분의 콘텐츠를 선택적으로 로드하는 경우에 유용합니다.
111. Using -all_load will allow the linker to parse all the static libraries and their content in parallel.
▶ -all_load를 사용하면, 링커가 모든 정적 라이브러리와 해당 콘텐츠를 병렬로 구문 분석할 수 있습니다.
112. But if your app does clever tricks where it has multiple static libraries implementing the same symbols, and depends on the command line order of the static libraries to drive which implementation is used, then this option is not for you.
▶ 그러나 앱이 동일한 기호를 구현하는 여러 정적 라이브러리가 있고, 사용되는 구현을 구동하기 위해 정적 라이브러리의 명령줄 순서에 의존하는 영리한 트릭을 수행하는 경우, 이 옵션은 적합하지 않습니다.
113. Because the linker will load all the implementations and not necessarily get the symbol semantics that were found in regular static linking mode.
▶ 링커는 모든 구현을 로드하고 일반 정적 연결 모드에서 발견된 기호 의미를 반드시 가져오는 것은 아니기 때문입니다.
114. The other downside of -all_load is that it may make your program bigger because "unused" code is now being added in.
▶ -all_load의 또 다른 단점은 "사용하지 않는" 코드가 추가되고 있기 때문에, 프로그램이 커질 수 있다는 것입니다..
115. To compensate for that, you can use the linker option -dead_strip.
▶ 이를 보완하기 위해 링커 옵션 -dead_strip을 사용할 수 있습니다.
116. That option will cause the linker to remove unreachable code and data.
▶ 이 옵션을 사용하면 링커가 연결할 수 없는 코드와 데이터를 제거합니다.
117. Now, the dead stripping algorithm is fast and usually pays for itself by reducing the size of the output file.
▶ 이제 데드 스트리핑 알고리즘은 빠르며 일반적으로 출력 파일의 크기를 줄임으로써 자체적으로 비용을 지불합니다.
118. But if you are interested in using -all_load and -dead_strip, you should time the linker with and without those options to see if it is a win for your particular case.
▶ 그러나 -all_load 및 -dead_strip을 사용하는 데 관심이 있는 경우, 해당 옵션이 있거나 없는 링커의 시간을 측정하여 특정 경우에 유리한지 확인해야 합니다.
119. The next linker option is -no_exported_symbols.
▶ 다음 링커 옵션은 -no_exported_symbols입니다.
120. A little background here.
▶ 여기에 약간의 배경이 있습니다.
121. One part of the LINKEDIT segment that the linker generates is an exports trie, which is a prefix tree that encodes all the exported symbol names, addresses, and flags.
▶ 링커가 생성하는 LINKEDIT 세그먼트의 한 부분은 모든 내보낸 기호 이름, 주소 및 플래그를 인코딩하는 접두사 트리인 내보내기 트리입니다.
122. Whereas all dylibs need to have exported symbols, a main app binary usually does not need any exported symbols.
▶ 모든 dylib에는 내보낸 기호가 있어야 하지만 기본 앱 바이너리에는 일반적으로 내보낸 기호가 필요하지 않습니다.
123. That is, usually nothing ever looks up symbols in the main executable.
▶ 즉, 일반적으로 기본 실행 파일에서 기호를 조회하지 않습니다.
124. If that is the case, you can use -no_exported_symbols for the app target to skip the creation of the trie data structure in LINKEDIT, which will improve link time.
▶ 이 경우 앱 대상에 -no_exported_symbols를 사용하여 LINKEDIT에서 trie 데이터 구조 생성을 건너뛸 수 있습니다. 그러면 링크 시간이 향상됩니다.
125. But if your app loads plugins which link back to the main executable, or you use xctest with your app as the host environment to run xctest bundles, your app must have all its exports, which means you cannot use -no_exported_symbols for that configuration.
▶ 그러나 앱이 기본 실행 파일로 다시 연결되는 플러그인을 로드하거나 xctest 번들을 실행하기 위한 호스트 환경으로 앱과 함께 xctest를 사용하는 경우 앱에는 모든 내보내기가 있어야 합니다. 즉, 해당 구성에 -no_exported_symbols를 사용할 수 없습니다.
126. Now, it only makes sense to try to suppress the exports trie if it is large.
▶ 이제 내보내기 시도가 큰 경우에만 억제하려고 시도하는 것이 합리적입니다.
127. You can run the dyld_info command shown here to count the number of exported symbols.
▶ 여기에 표시된 dyld_info 명령을 실행하여 내보낸 기호 수를 계산할 수 있습니다.
128. One large app we saw had about one million exported symbols.
▶ 우리가 본 한 대형 앱에는 약 100만 개의 심볼이 내보내졌습니다.
129. And the linker took two to three seconds to build the exports trie for that many symbols.
▶ 그리고 링커는 많은 심볼에 대한 내보내기 시도를 빌드하는 데 2-3초가 걸렸습니다.
130. So adding -no_exported_symbols shaved two to three seconds off the link time of that app.
▶ 따라서 -no_exported_symbols를 추가하면 해당 앱의 링크 시간이 2~3초 단축되었습니다.
131. I'll tell you more about the dyld_info tool later in this talk.
▶ 이 이야기의 뒷부분에서 dyld_info 도구에 대해 자세히 설명하겠습니다.
132. The next option is: -no_deduplicate.
▶ 다음 옵션은 -no_deduplicate입니다.
133. A few years back we added a new pass to the linker to merge functions that have the same instructions but different names.
▶ 몇 년 전에 우리는 명령어는 같지만, 이름이 다른 함수를 병합하기 위해 링커에 새로운 패스를 추가했습니다.
134. It turns out, with C++ template expansions, you can get a lot of those.
▶ C++ 템플릿 확장으로 많은 것을 얻을 수 있다는 것이 밝혀졌습니다.
135. But this is an expensive algorithm.
▶ 그러나 이것은 값비싼 알고리즘입니다.
136. The linker has to recursively hash the instructions of every function, to help look for duplicates.
▶ 링커는 중복을 찾는 데 도움이 되도록 모든 함수의 명령을 재귀적으로 해시해야 합니다.
137. Because of the expense, we limited the algorithm so the linker only looks at weak-def symbols.
▶ 비용 때문에 링커가 약한 정의 기호만 보도록 알고리즘을 제한했습니다.
138. Those are the ones the C++ compiler emits for template expansions that were not inlined.
▶ 인라인되지 않은 템플릿 확장에 대해 C++ 컴파일러가 내보내는 것들입니다.
139. Now, de-dup is a size optimization, and Debug builds are about fast builds, and not about size.
▶ 이제 중복 제거는 크기 최적화이며 디버그 빌드는 크기가 아니라 빠른 빌드에 관한 것입니다.
140. So by default, Xcode disables the de-dup optimization by passing -no_deduplicate to the linker for Debug configurations.
▶ 따라서 기본적으로 Xcode는 디버그 구성을 위해 -no_deduplicate를 링커에 전달하여 중복 제거 최적화를 비활성화합니다.
141. And clang will also pass the no-dedup option to the linker if you run clang link line with -O0.
▶ 또한 -O0으로 clang 링크 라인을 실행하면, clang은 중복 제거 없음 옵션을 링커에 전달합니다.
142. In summary, if you use C++ and have a custom build, that is, either you use a non-standard configuration in Xcode, or you use some other build system, you should ensure your debug builds add -no_deduplicate to improve link time.
▶ 요약하면, C++를 사용하고 사용자 정의 빌드가 있는 경우, 즉 Xcode에서 비표준 구성을 사용하거나 다른 빌드 시스템을 사용하는 경우 디버그 빌드에 -no_deduplicate를 추가하여 링크 시간을 개선해야 합니다.
143. The options I just talked about are the actual command line arguments to ld.
▶ 방금 말한 옵션은 ld에 대한 실제 명령줄 인수입니다.
144. When using Xcode, you need to change your product build settings.
▶ Xcode를 사용할 때 제품 빌드 설정을 변경해야 합니다.
145. Inside build settings, look for "Other Linker Flags".
▶ 빌드 설정에서 "기타 링커 플래그"를 찾습니다.
146. Here's what you would set for -all_load.
▶ 다음은 -all_load에 대해 설정하는 것입니다.
147. And notice the "Dead Code Stripping" option is here as well.
▶ "Dead Code Stripping" 옵션도 여기에 있습니다.
148. And there's -no_exported_symbols.
▶ 그리고 -no_exported_symbols가 있습니다.
149. And here's -no_deduplicate.
▶ 그리고 여기에 -no_deduplicate가 있습니다.
150. Now let's talk about some surprises you may experience when using static libraries.
▶ 이제 정적 라이브러리를 사용할 때 경험할 수 있는 몇 가지 놀라움에 대해 이야기해 보겠습니다.
151. The first surprise is when you have source code that builds into a static library which your app links with, and that code does not end up in the final app.
▶ 첫 번째 놀라움은 앱이 연결되는 정적 라이브러리로 빌드되는 소스 코드가 있고, 해당 코드가 최종 앱에서 끝나지 않을 때입니다.
152. For instance, you added "attribute used" to some function, or you have an Objective-C category.
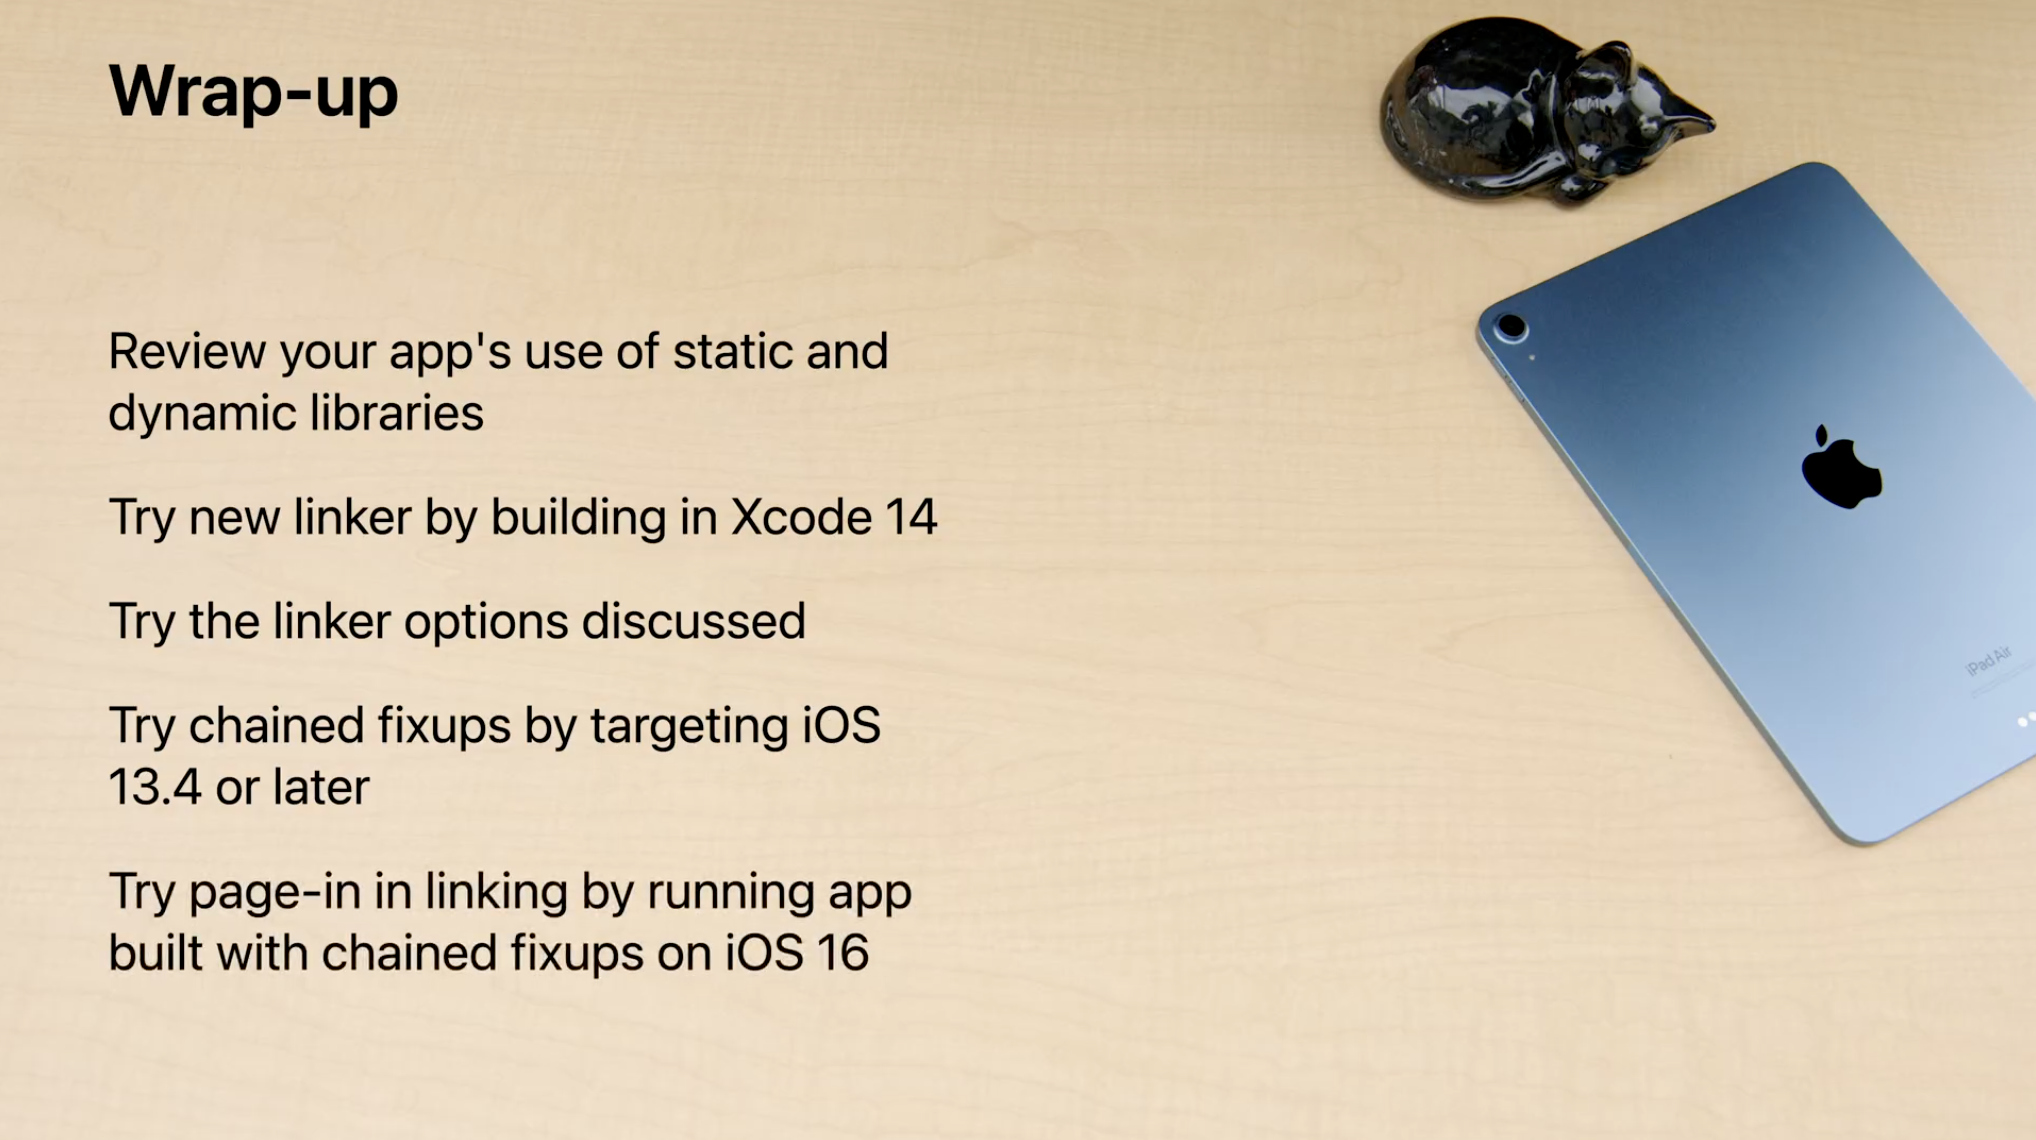
▶ 예를 들어, 일부 기능에 "사용된 속성"을 추가했거나 Objective-C 범주가 있습니다.
153. Because of the selective loading the linker does, if those object files in the static library don't also define some symbol that is needed during the link, those object files won't get loaded by the linker.
▶ 링커가 선택적으로 로드하기 때문에 정적 라이브러리의 해당 개체 파일이 링크 중에 필요한 일부 기호도 정의하지 않으면 해당 개체 파일이 링커에 의해 로드되지 않습니다.
154. Another interesting interaction is static libraries and dead stripping.
▶ 또 다른 흥미로운 상호 작용은 정적 라이브러리와 데드 스트리핑입니다.
155. It turns out dead stripping can hide many static library issues.
▶ 데드 스트리핑은 많은 정적 라이브러리 문제를 숨길 수 있습니다.
156. Normally, missing symbols or duplicate symbols will cause the linker to error out.
▶ 일반적으로 누락된 기호나 중복된 기호로 인해 링커에 오류가 발생합니다.
157. But dead stripping causes the linker to run a reachability pass across all the code and data, starting from main, and if it turns out the missing symbol is from an unreachable code, the linker will suppress the missing symbol error.
▶ 그러나 데드 스트리핑은 링커가 기본에서 시작하여 모든 코드와 데이터에 걸쳐 도달 가능성 패스를 실행하게 하고 누락된 기호가 연결할 수 없는 코드에서 온 것으로 밝혀지면 링커는 누락된 기호 오류를 억제합니다.
158. Similarly, if there are duplicate symbols from static libraries, the linker will pick the first and not error.
▶ 유사하게, 정적 라이브러리에 중복된 기호가 있는 경우 링커는 오류가 아닌 첫 번째 기호를 선택합니다.
159. The last big surprise with using static libraries, is when a static library is incorporated into multiple frameworks.
▶ 정적 라이브러리를 사용할 때 마지막으로 큰 놀라움은 정적 라이브러리가 여러 프레임워크에 통합될 때입니다.
160. Each of those frameworks runs fine in isolation, but then at some point, some app uses both frameworks, and boom, you get weird runtime issues because of the multiple definitions.
▶ 이러한 각 프레임워크는 독립적으로 잘 실행되지만 어느 시점에서 일부 앱은 두 프레임워크를 모두 사용하고 붐, 여러 정의로 인해 이상한 런타임 문제가 발생합니다.
161. The most common case you will see is the Objective-C runtime warning about multiple instances of the same class name.
▶ 가장 일반적인 경우는 동일한 클래스 이름의 여러 인스턴스에 대한 Objective-C 런타임 경고입니다.
162. Overall, static libraries are powerful, but you need to understand them to avoid the pitfalls.
▶ 전반적으로 정적 라이브러리는 강력하지만 함정을 피하려면 정적 라이브러리를 이해해야 합니다.
163. That wraps up static linking.
▶ 이것으로 정적 링크를 마무리합니다.
164. Now, let's move on to dynamic linking.
▶ 이제 동적 연결로 넘어 갑시다.
165. First, let's look at the original diagram for static linking with a static library.
▶ 먼저 정적 라이브러리와의 정적 링크에 대한 원본 다이어그램을 살펴보겠습니다.
166. Now think about how this will scale over time, as there is more and more source code.
▶ 이제 점점 더 많은 소스 코드가 있으므로 이것이 시간이 지남에 따라 어떻게 확장되는지 생각해 보십시오.
167. It should be clear that as more and more libraries are made available, the end program may grow in size.
▶ 점점 더 많은 라이브러리를 사용할 수 있게 되면 최종 프로그램의 크기가 커질 수 있습니다.
168. That means the static link time to build that program will also increase over time.
▶ 즉, 해당 프로그램을 빌드하는 정적 링크 시간도 시간이 지남에 따라 증가합니다.
169. Now let's look at how these libraries are made.
▶ 이제 이러한 라이브러리가 어떻게 만들어지는지 살펴보겠습니다.
170. What if we did this switch? We change 'ar' to 'ld' and the output library is now an executable binary.
▶ 이 전환을 하면 어떨까요? 'ar'를 'ld'로 변경하고 출력 라이브러리는 이제 실행 가능한 바이너리입니다.
171. This was the start of dynamic libraries in the '90s.
▶ 이것이 90년대 동적 라이브러리의 시작이었습니다.
172. As a shorthand, we call dynamic libraries "dylibs".
▶ 줄여서 동적 라이브러리를 "dylibs"라고 부릅니다.
173. On other platforms they are known as DSOs or DLLs.
▶ 다른 플랫폼에서는 DSO 또는 DLL이라고 합니다.
174. So what exactly is going on here? And how does that help the scalability? The key is that the static linker treats linking with a dynamic library differently.
▶ 여기에서 정확히 무슨 일이 일어나고 있습니까? 그리고 그것이 확장성에 어떻게 도움이 됩니까? 핵심은 정적 링커가 동적 라이브러리와의 연결을 다르게 취급한다는 것입니다.
175. Instead of copying code out of the library into the final program, the linker just records a kind of promise.
▶ 라이브러리에서 최종 프로그램으로 코드를 복사하는 대신 링커는 일종의 약속을 기록합니다.
176. That is, it records the symbol name used from the dynamic library and what the library's path will be at runtime.
▶ 즉, 동적 라이브러리에서 사용되는 기호 이름과 런타임 시 라이브러리의 경로가 무엇인지 기록합니다.
177. How is this an advantage? It means your program file size is under your control.
▶ 이것이 어떻게 장점입니까? 그것은 당신의 프로그램 파일 크기가 당신의 통제 하에 있음을 의미합니다.
178. It just contains your code, and a list of dynamic libraries it needs at runtime.
▶ 여기에는 코드와 런타임에 필요한 동적 라이브러리 목록만 포함됩니다.
179. You no longer get copies of library code in your program.
▶ 더 이상 프로그램에서 라이브러리 코드 사본을 얻지 못합니다.
180. Your program's static link time is now proportional to the size of your code, and independent of the number of dylibs you link with.
▶ 프로그램의 정적 링크 시간은 이제 코드 크기에 비례하고 링크하는 dylib 수와 무관합니다.
181. Also, the Virtual Memory system can now shine.
▶ 또한 가상 메모리 시스템은 이제 빛날 수 있습니다.
182. When it sees the same dynamic library used in multiple processes, the Virtual Memory system will re-use the same physical pages of RAM for that dylib in all processes that use that dylib.
▶ 여러 프로세스에서 동일한 동적 라이브러리가 사용되는 경우 가상 메모리 시스템은 해당 dylib를 사용하는 모든 프로세스에서 해당 dylib에 대해 동일한 물리적 RAM 페이지를 재사용합니다.
183. I've shown you how dynamic libraries started and what problem they solve.
▶ 동적 라이브러리가 어떻게 시작되고 어떤 문제를 해결하는지 보여 주었습니다.
184. But what are the "costs" for those "benefits"? First, a benefit of using dynamic libraries is that we have sped up build time.
▶ 그러나 이러한 "이점"에 대한 "비용"은 무엇입니까? 첫째, 동적 라이브러리 사용의 이점은 빌드 시간을 단축했다는 것입니다.
185. But the cost is that launching your app is now slower.
▶ 그러나 비용은 이제 앱 실행 속도가 느려진다는 것입니다.
186. This is because launching is no longer just loading one program file.
▶ 이것은 시작이 더 이상 하나의 프로그램 파일을 로드하는 것이 아니기 때문입니다.
187. Now all the dylibs also need to be loaded and connected together.
▶ 이제 모든 dylib도 로드하고 함께 연결해야 합니다.
188. In other words, you just deferred some of the linking costs from build time to launch time.
▶ 즉, 빌드 시간에서 시작 시간으로 연결 비용의 일부를 연기했습니다.
189. Second, a dynamic library based program will have more dirty pages.
▶ 둘째, 동적 라이브러리 기반 프로그램은 더티 페이지를 갖게 됩니다.
190. In the static library case, the linker would co-locate all globals from all static libraries into the same DATA pages in the main executable.
▶ 정적 라이브러리의 경우 링커는 모든 정적 라이브러리의 모든 전역을 기본 실행 파일의 동일한 DATA 페이지에 같은 위치에 배치합니다.
191. But with dylibs, each library has its DATA page.
▶ 그러나 dylib를 사용하면 각 라이브러리에는 DATA 페이지가 있습니다.
192. Lastly, another cost of dynamic linking is that it introduces the need for something new: a dynamic linker! Remember that promise that was recorded in the executable at build time? Now we need something at runtime that will fulfill that promise to load our library.
▶ 마지막으로, 동적 연결의 또 다른 비용은 새로운 것이 필요하다는 것입니다. 동적 링커입니다! 빌드 시 실행 파일에 기록된 약속을 기억하십니까? 이제 우리는 라이브러리를 로드한다는 약속을 이행할 런타임 시 무언가가 필요합니다.
193. That's what dyld, the dynamic linker, is for.
▶ 이것이 바로 동적 링커인 dyld가 사용하는 기능입니다.
194. Let's dive into how dynamic linking works at runtime.
▶ 런타임에 동적 연결이 작동하는 방식에 대해 알아보겠습니다.
195. An executable binary is divided up into segments, usually at least TEXT, DATA, and LINKEDIT.
▶ 실행 가능한 바이너리는 일반적으로 최소한 TEXT, DATA 및 LINKEDIT의 세그먼트로 나뉩니다.
196. Segments are always a multiple of the page size for the OS.
▶ 세그먼트는 항상 OS 페이지 크기의 배수입니다.
197. Each segment has a different permission.
▶ 각 세그먼트에는 다른 권한이 있습니다.
198. For example, the TEXT segment has "execute" permissions.
▶ 예를 들어, TEXT 세그먼트에는 "실행" 권한이 있습니다.
199. That means the CPU may treat the bytes on the page as machine code instructions.
▶ 이는 CPU가 페이지의 바이트를 기계어 명령어로 취급할 수 있음을 의미합니다.
200. At runtime, dyld has to mmap() the executables into memory with each segments' permissions, as show here.
▶ 런타임 시 dyld는 여기에 표시된 것처럼 각 세그먼트의 권한으로 실행 파일을 메모리에 mmap()해야 합니다.
201. Because the segments are page sized and page aligned, that makes it straightforward for the virtual memory system to just set up the program or dylib file as backing store for a VM range.
▶ 세그먼트가 페이지 크기 및 페이지 정렬이기 때문에 가상 메모리 시스템이 프로그램 또는 dylib 파일을 VM 범위의 백업 저장소로 설정하는 것이 간단합니다.
202. That means nothing is loaded into RAM until there is some memory access on those pages, which triggers a page fault, which causes the VM system to read the proper subrange of the file and fill in the needed RAM page with its content.
▶ 즉, 해당 페이지에 메모리 액세스가 있을 때까지 아무 것도 RAM에 로드되지 않으며, 이로 인해 페이지 오류가 발생하여 VM 시스템이 파일의 적절한 하위 범위를 읽고 필요한 RAM 페이지를 내용으로 채웁니다.
203. But just mapping is not enough.
▶ 그러나 매핑만으로는 충분하지 않습니다.
204. Somehow the program needs to be "wired up" or bound to the dylib.
▶ 어떻게든 프로그램을 "연결"하거나 dylib에 바인딩해야 합니다.
205. For that we have a concept called "fix ups".
▶ 이를 위해 "수정"이라는 개념이 있습니다.
206. In the diagram, we see the program got pointers set up that point to the parts of the dylib it uses.
▶ 다이어그램에서 우리는 프로그램이 사용하는 dylib 부분에 대한 포인터를 설정한 것을 볼 수 있습니다.
207. Let's dive into what fix-ups are.
▶ 수정 사항이 무엇인지 알아보겠습니다.
208. Here is our friend, the mach-o file.
▶ 여기 우리의 친구인 mach-o 파일이 있습니다.
209. Now, TEXT is immutable.
▶ 이제 TEXT는 변경할 수 없습니다.
210. And in fact, it has to be in a system based on code signing.
▶ 그리고 실제로 코드 서명을 기반으로 하는 시스템에 있어야 합니다.
211. So what if there is a function that calls malloc()? How can that work? The relative address of _malloc can't be known when the program was built.
▶ 그렇다면 malloc()을 호출하는 함수가 있다면 어떻게 될까요? 어떻게 작동합니까? 프로그램이 빌드될 때 _malloc의 상대 주소를 알 수 없습니다.
212. Well, what happens is, the static linker saw that malloc was in a dylib and transformed the call site.
▶ 글쎄요, 정적 링커는 malloc이 dylib에 있는 것을 보고 호출 사이트를 변환했습니다.
213. The call site becomes a call to a stub synthesized by the linker in the same TEXT segment, so the relative address is known at build time, which means the BL instruction can be correctly formed.
▶ 호출 사이트는 동일한 TEXT 세그먼트의 링커에 의해 합성된 스텁에 대한 호출이 되므로 빌드 시 상대 주소를 알 수 있습니다. 이는 BL 명령이 올바르게 형성될 수 있음을 의미합니다.
214. How that helps is that the stub loads a pointer from DATA and jumps to that location.
▶ 그것이 도움이 되는 방법은 스텁이 DATA에서 포인터를 로드하고 해당 위치로 점프한다는 것입니다.
215. Now, no changes to TEXT are needed at runtime– just DATA is changed by dyld.
▶ 이제 런타임에 TEXT를 변경할 필요가 없습니다. dyld에 의해 DATA만 변경됩니다.
216. In fact, the secret to understanding dyld is that all fixups done by dyld are just dyld setting a pointer in DATA.
▶ 사실, dyld를 이해하는 비밀은 dyld에 의해 수행된 모든 수정이 단지 dyld가 DATA에 포인터를 설정한다는 것입니다.
217. So let's dig more into the fixups that dyld does.
▶ dyld가 수행하는 수정 사항에 대해 더 자세히 알아보겠습니다.
218. Somewhere in LINKEDIT is the information dyld needs to drive what fixups are done.
▶ LINKEDIT의 어딘가에는 수정 작업을 수행하는 데 필요한 정보가 있습니다.
219. There are two kinds of fixups.
▶ 수정에는 두 가지 종류가 있습니다.
220. The first are called rebases, and they are when a dylib or app has a pointer that points within itself.
▶ 첫 번째는 리베이스(rebase)라고 하며 dylib 또는 앱에 자신을 가리키는 포인터가 있는 경우입니다.
221. Now there is a security feature called ASLR, which causes dyld to load dylibs at random addresses.
▶ 이제 dyld가 임의의 주소에서 dylib를 로드하도록 하는 ASLR이라는 보안 기능이 있습니다.
222. And that means those interior pointers cannot just be set at build time.
▶ 즉, 이러한 내부 포인터는 빌드 시에만 설정할 수 없습니다.
223. Instead, dyld needs to adjust or "rebase" those pointers at launch.
▶ 대신 dyld는 시작 시 해당 포인터를 조정하거나 "리베이스"해야 합니다.
224. On disk, those pointers contain their target address, if the dylib were to be loaded at address zero.
▶ 디스크에서 해당 포인터는 dylib가 주소 0에서 로드되는 경우 대상 주소를 포함합니다.
225. That way, all the LINKEDIT needs to record is the location of each rebase location.
▶ 그렇게 하면 LINKEDIT가 기록해야 하는 모든 것은 각 리베이스 위치의 위치입니다.
226. Dyld can then just add the actual load address of the dylib to each of the rebase locations to correctly fix them up.
▶ 그런 다음 Dyld는 dylib의 실제 로드 주소를 각 리베이스 위치에 추가하여 올바르게 수정할 수 있습니다.
227. The second kind of fixups are binds.
▶ 두 번째 유형의 수정은 바인드입니다.
228. Binds are symbolic references.
▶ 바인드는 기호 참조입니다.
229. That is, their target is a symbol name and not a number.
▶ 즉, 대상은 숫자가 아닌 기호 이름입니다.
230. For instance, a pointer to the function "malloc".
▶ 예를 들어 "malloc" 함수에 대한 포인터입니다.
231. The string "_malloc" is actually stored in LINKEDIT, and dyld uses that string to look up the actual address of malloc in the exports trie of libSystem.dylib.
▶ 문자열 "_malloc"은 실제로 LINKEDIT에 저장되며 dyld는 해당 문자열을 사용하여 libSystem.dylib의 내보내기 트리에서 malloc의 실제 주소를 조회합니다.
232. Then, dyld stores that value in the location specified by the bind.
▶ 그런 다음 dyld는 바인드에서 지정한 위치에 해당 값을 저장합니다.
233. This year we are announcing a new way to encode fixups, that we call "chained fixups".
▶ 올해 우리는 "연결된 수정"이라고 하는 수정을 인코딩하는 새로운 방법을 발표합니다.
234. The first advantage is that is makes LINKEDIT smaller.
▶ 첫 번째 장점은 LINKEDIT를 더 작게 만든다는 것입니다.
235. The LINKEDIT is smaller because instead of storing all the fixup locations, the new format just stores where the first fixup location is in each DATA page, as well as a list of the imported symbols.
▶ LINKEDIT는 모든 수정 위치를 저장하는 대신 각 DATA 페이지의 첫 번째 수정 위치와 가져온 기호 목록만 저장하기 때문에 새 형식이 더 작습니다.
236. Then the rest of the information is encoded in the DATA segment itself, in the place where the fixups will ultimately be set.
▶ 그런 다음 나머지 정보는 최종적으로 수정이 설정되는 위치에서 DATA 세그먼트 자체에 인코딩됩니다.
237. This new format gets its name, chained fixups, from the fact that the fixup locations are "chained" together.
▶ 이 새로운 형식은 수정 위치가 함께 "연결"되어 있다는 사실에서 연결 수정이라는 이름을 얻습니다.
238. The LINKEDIT just says where the first fixup was, then in the 64-bit pointer location in DATA, some of the bits contain the offset to the next fixup location.
▶ LINKEDIT는 첫 번째 수정이 있었던 위치를 말한 다음 DATA의 64비트 포인터 위치에서 일부 비트에 다음 수정 위치에 대한 오프셋을 포함합니다.
239. Also packed in there is a bit that says if the fixup is a bind or a rebase.
▶ 또한 수정이 바인드인지 리베이스인지 알려주는 비트가 있습니다.
240. If it is a bind, the rest of the bits are the index of the symbol.
▶ 바인드인 경우 나머지 비트는 기호의 인덱스입니다.
241. If it's a rebase, the rest of the bits are the offset of the target within the image.
▶ 리베이스인 경우 나머지 비트는 이미지 내 대상의 오프셋입니다.
242. Lastly, runtime support for chained fixups already exists in iOS 13.4 and later.
▶ 마지막으로, 연결된 수정에 대한 런타임 지원은 iOS 13.4 이상에 이미 존재합니다.
243. Which means you can start using this new format today, as long as your deployment target is iOS 13.4 or later.
▶ 즉, 배포 대상이 iOS 13.4 이상인 한 오늘 이 새로운 형식을 사용할 수 있습니다.
244. And the chained fixup format enables a new OS feature we are announcing this year.
▶ 그리고 연결된 수정 형식은 올해 발표하는 새로운 OS 기능을 가능하게 합니다.
245. But to understand that, I need to talk about how dyld works.
▶ 그러나 그것을 이해하려면 dyld가 작동하는 방식에 대해 이야기해야 합니다.
246. Dyld starts with the main executable– say your app.
▶ Dyld는 기본 실행 파일로 시작합니다.
247. Parses that mach-o to find the dependent dylibs, that is, what promised dynamic libraries it needs.
▶ 종속 dylib, 즉 약속된 동적 라이브러리를 찾기 위해 해당 mach-o를 구문 분석합니다.
248. It finds those dylibs and mmap()s them.
▶ 해당 dylib와 mmap()을 찾습니다.
249. Then for each of those, it recurses and parses their mach-o structures, loading any additional dylibs as needed.
▶ 그런 다음 각각에 대해 mach-o 구조를 재귀 및 구문 분석하여 필요에 따라 추가 dylib를 로드합니다.
250. Once everything is loaded, dyld looks up all the bind symbols needed and uses those addresses when doing fixups.
▶ 모든 것이 로드되면 dyld는 필요한 모든 바인드 기호를 조회하고 수정을 수행할 때 해당 주소를 사용합니다.
251. Lastly, once all the fixups are done, dyld runs initializers, bottom up.
▶ 마지막으로 모든 수정이 완료되면 dyld는 이니셜라이저를 상향식으로 실행합니다.
252. Five years ago we announced a new dyld technology.
▶ 5년 전에 우리는 새로운 dyld 기술을 발표했습니다.
253. We realized the steps in green above were the same every time your app was launched.
▶ 위의 녹색 단계는 앱이 출시될 때마다 동일하다는 것을 깨달았습니다.
254. So as long as the program and dylibs did not change, all the steps in green could be cached on first launch and re-used on subsequent launches.
▶ 따라서 프로그램과 dylibs가 변경되지 않는 한 녹색으로 표시된 모든 단계는 첫 번째 실행 시 캐시되고 후속 실행 시 재사용될 수 있습니다.
255. This year we are announcing additional dyld performance improvements.
▶ 올해 우리는 추가적인 dyld 성능 개선 사항을 발표합니다.
256. We are announcing a new dyld feature called "page-in linking".
▶ "페이지 인 연결"이라는 새로운 dyld 기능을 발표합니다.
257. Instead of dyld applying all the fixups to all dylibs at launch, the kernel can now apply fixups to your DATA pages lazily, on page-in.
▶ dyld가 실행 시 모든 dylib에 모든 수정 사항을 적용하는 대신 이제 커널은 페이지 인 시 DATA 페이지에 수정 사항을 느리게 적용할 수 있습니다.
258. It has always been the case that the first use of some address in some page of an mmap()ed region triggered the kernel to read in that page.
▶ mmap() 처리된 영역의 일부 페이지에서 일부 주소를 처음 사용하면 커널이 해당 페이지에서 읽도록 트리거되는 경우가 항상 있었습니다.
259. But now, if it is a DATA page, the kernel will also apply the fixup that page needs.
▶ 그러나 이제 DATA 페이지인 경우 커널은 해당 페이지에 필요한 수정 사항도 적용합니다.
260. We have had a special case of page-in linking for over a decade for OS dylibs in the dyld shared cache.
▶ 우리는 dyld 공유 캐시에 있는 OS dylib에 대해 10년 넘게 페이지 인 링크의 특별한 경우가 있었습니다.
261. This year we generalized it and made it available to everyone.
▶ 올해 우리는 이를 일반화하여 모든 사람이 사용할 수 있도록 했습니다.
262. This mechanism reduces dirty memory and launch time.
▶ 이 메커니즘은 더티 메모리와 시작 시간을 줄입니다.
263. It also means DATA_CONST pages are clean, which means they can be evicted and recreated just like TEXT pages, which reduces memory pressure.
▶ 이는 또한 DATA_CONST 페이지가 깨끗하다는 것을 의미합니다. 즉, TEXT 페이지처럼 축출 및 재생성될 수 있어 메모리 압력이 감소합니다.
264. This page-in linking feature will be in the upcoming release of iOS, macOS, and watchOS.
▶ 이 페이지 인 연결 기능은 iOS, macOS 및 watchOS의 차기 릴리스에 포함될 예정입니다.
265. But page-in linking only works for binaries built with chained fixups.
▶ 그러나 페이지 인 링크는 연결된 수정으로 빌드된 바이너리에서만 작동합니다.
266. That is because with chained fixups, most of the fixup information will be encoded in the DATA segment on disk, which means it is available to the kernel during page-in.
▶ 이는 연결 수정을 사용하면 수정 정보의 대부분이 디스크의 DATA 세그먼트에 인코딩되어 페이지 인 중에 커널에서 사용할 수 있기 때문입니다.
267. One caveat is that dyld only uses this mechanism during launch.
▶ 한 가지 주의 사항은 dyld가 시작하는 동안에만 이 메커니즘을 사용한다는 것입니다.
268. Any dylibs dlopen()ed later do not get page-in linking.
▶ 나중에 dlopen()된 모든 dylib는 페이지 인 링크를 가져오지 않습니다.
269. In that case, dyld takes the traditional path and applies the fixups during the dlopen call.
▶ 이 경우 dyld는 기존 경로를 사용하여 dlopen 호출 중에 수정 사항을 적용합니다.
270. With that in mind, let's go back to the dyld workflow diagram.
▶ 이를 염두에 두고 dyld 워크플로 다이어그램으로 돌아가 보겠습니다.
271. For five years now, dyld has been optimizing the steps above in green by caching that work on first launch and reusing it on later launches.
▶ 5년 동안 dyld는 첫 번째 출시에서 작업을 캐싱하고 이후 출시에서 재사용함으로써 위의 단계를 녹색으로 최적화하고 있습니다.
272. Now, dyld can optimize the "apply fixup" step by not actually doing the fixups, and letting the kernel do them lazily on page-in.
▶ 이제 dyld는 실제로 수정을 수행하지 않고 커널이 페이지 인에서 느리게 수정하도록 하여 "수정 적용" 단계를 최적화할 수 있습니다.
273. Now that you have seen what's new in dyld, let's talk about best practices for dynamic linking.
▶ 이제 dyld의 새로운 기능을 확인했으므로 동적 연결에 대한 모범 사례에 대해 이야기해 보겠습니다.
274. What can you do to help improve dynamic link performance? As I just showed, dyld has already accelerated most of the steps in dynamic linking.
▶ 동적 링크 성능을 개선하기 위해 무엇을 할 수 있습니까? 방금 보여드린 것처럼 dyld는 이미 동적 연결의 대부분의 단계를 가속화했습니다.
275. One thing you can control is how many dylibs you have.
▶ 당신이 통제할 수 있는 한 가지는 당신이 가지고 있는 dylibs의 수입니다.
276. The more dylibs there are, the more work dyld has to do to load them.
▶ 더 많은 dylib가 있을수록 dyld는 이를 로드하기 위해 더 많은 작업을 수행해야 합니다.
277. Conversely, the fewer dylibs, the less work dyld has to perform.
▶ 반대로 dylib가 적을수록 dyld가 수행해야 하는 작업도 줄어듭니다.
278. The next thing you can look at are static initializers, which is code that always runs, pre-main.
▶ 다음으로 볼 수 있는 것은 항상 실행되는 코드인 정적 이니셜라이저입니다.
279. For instance, don't do I/O or networking in a static initializer.
▶ 예를 들어, 정적 이니셜라이저에서 I/O 또는 네트워킹을 수행하지 마십시오.
280. Anything that can take more than a few milliseconds should never be done in an initializer.
▶ 몇 밀리초 이상 걸릴 수 있는 모든 작업은 초기화 프로그램에서 수행해서는 안 됩니다.
281. As we know, the world is getting more complicated, and your users want more functionality.
▶ 알다시피 세상은 점점 더 복잡해지고 있으며 사용자는 더 많은 기능을 원합니다.
282. So it makes sense to use libraries to manage all that functionality.
▶ 따라서 라이브러리를 사용하여 해당 기능을 모두 관리하는 것이 좋습니다.
283. Your goal is to find your sweet spot between dynamic and static libraries.
▶ 목표는 동적 라이브러리와 정적 라이브러리 사이에서 최적의 지점을 찾는 것입니다.
284. Too many static libraries and your iterative build/debug cycle is slowed down.
▶ 정적 라이브러리가 너무 많고 반복적인 빌드/디버그 주기가 느려집니다.
285. On the other hand, too many dynamic libraries and your launch time is slow and your customers notice.
▶ 반면에 동적 라이브러리가 너무 많고 시작 시간이 느리고 고객이 알아차립니다.
286. But we sped up ld64 this year, so your sweet spot may have changed, as you can now use more static libraries, or more source files directly in your app, and still build in the same amount of time.
▶ 그러나 올해 ld64 속도를 높였으므로 이제 더 많은 정적 라이브러리 또는 더 많은 소스 파일을 앱에서 직접 사용할 수 있고 여전히 동일한 시간에 빌드할 수 있으므로 최적의 위치가 변경되었을 수 있습니다.
287. Lastly, if it works for your installed base, updating to a newer deployment target can enable the tools to generate chained fixups, making your binaries smaller, and improving launch time.
▶ 마지막으로, 설치 기반에서 작동하는 경우 새로운 배포 대상으로 업데이트하면 도구가 연결된 수정을 생성하여 바이너리를 더 작게 만들고 실행 시간을 개선할 수 있습니다.
288. The last thing I'd like you all to be aware of is two new tools that will help you peek inside the linking process.
▶ 마지막으로 여러분 모두가 알고 있기를 바라는 것은 연결 과정을 들여다보는 데 도움이 될 두 가지 새로운 도구입니다.
289. The first tool is dyld_usage.
▶ 첫 번째 도구는 dyld_usage입니다.
290. You can use it to get a trace of what dyld is doing.
▶ dyld가 무엇을 하는지 추적하는 데 사용할 수 있습니다.
291. The tool is only on macOS, but you can use it to trace your app launching in the simulator, or if your app built for Mac Catalyst.
▶ 이 도구는 macOS에만 있지만 이 도구를 사용하여 시뮬레이터에서 앱 시작을 추적하거나 앱이 Mac Catalyst용으로 빌드된 경우 추적할 수 있습니다.
292. Here is an example run against TextEdit on macOS.
▶ 다음은 macOS에서 TextEdit에 대해 실행한 예입니다.
293. As you can tell by the top few lines, the launch took 15ms overall, but only 1ms for fixups, thanks to page-in linking.
▶ 맨 위의 몇 줄에서 알 수 있듯이 실행은 전체적으로 15ms가 걸렸지만 페이지 인 링크 덕분에 수정에는 1ms만 걸렸습니다.
294. The vast majority of time is now spent in static initializers.
▶ 대부분의 시간은 이제 정적 이니셜라이저에 사용됩니다.
295. The next tool is dyld_info.
▶ 다음 도구는 dyld_info입니다.
296. You can use it to inspect binaries, both on disk and in the current dyld cache.
▶ 이를 사용하여 디스크와 현재 dyld 캐시 모두에서 바이너리를 검사할 수 있습니다.
297. The tool has many options, but I'll show you how to view exports and fixups.
▶ 이 도구에는 많은 옵션이 있지만 내보내기 및 수정을 보는 방법을 보여 드리겠습니다.
298. Here the -fixup option shows all the fixup locations dyld will process and their targets.
▶ 여기서 -fixup 옵션은 dyld가 처리할 모든 수정 위치와 해당 대상을 표시합니다.
299. The output is the same regardless of if the file is old style fixups or new chained fixups.
▶ 파일이 이전 스타일 수정이든 새로운 연결 수정이든 상관없이 출력은 동일합니다.
300. Here the -exports option will show all the exported symbols in the dylib, and the offset of each symbol from the start of the dylib.
▶ 여기서 -exports 옵션은 dylib에서 내보낸 모든 기호와 dylib의 시작 부분에서 각 기호의 오프셋을 표시합니다.
301. In this case, it is showing information about Foundation.
▶ 이 경우 Foundation에 대한 정보를 표시합니다.
302. framework which is the dylib in the dyld cache.
▶ dyld 캐시의 dylib인 프레임워크.
303. There is no file on disk, but the dyld_info tool uses the same code as dyld and can thus find it.
▶ 디스크에 파일이 없지만 dyld_info 도구는 dyld와 동일한 코드를 사용하므로 찾을 수 있습니다.
304. Now that you understand the history and tradeoffs of static versus dynamic libraries, you should review what you app does and determine if you have found your sweet spot.
▶ 이제 정적 라이브러리와 동적 라이브러리의 히스토리와 트레이드오프를 이해했으므로 앱이 수행하는 작업을 검토하고 최적의 지점을 찾았는지 확인해야 합니다.
305. Next, if you have a large app and have noticed the build takes a while to link, try out Xcode 14 which has the new faster linker.
▶ 다음으로, 큰 앱이 있고 빌드를 연결하는 데 시간이 걸린다는 것을 알게 된 경우, 더 빠른 새로운 링커가 있는 Xcode 14를 사용해 보십시오.
306. If you still want to speed up your static link more, look into the three linker options I detailed and see if they make sense in your build, and improve your link time.
▶ 여전히 정적 링크의 속도를 높이고 싶다면, 내가 자세히 설명한 세 가지 링커 옵션을 살펴보고 빌드에서 의미가 있는지 확인하고 링크 시간을 개선하십시오.
307. Lastly, you can also try building your app, and any embedded frameworks, for iOS 13.4 or later to enable chained fixups.
▶ 마지막으로 iOS 13.4 이상용으로 앱과 임베디드 프레임워크를 빌드하여 연결 수정을 활성화할 수도 있습니다.
308. Then see if your app is smaller and launches faster on iOS 16.
▶ 그런 다음 iOS 16에서 앱이 더 작고 더 빠르게 실행되는지 확인하세요..
309. Thanks for watching, and have a great WWDC.
▶ 시청해주셔서 감사합니다. 좋은 WWDC 되세요.
출처
Link fast: Improve build and launch times - WWDC22 - Videos - Apple Developer
Discover how to improve your app's build and runtime linking performance. We'll take you behind the scenes to learn more about linking,...
developer.apple.com
'iOS 문서 > WWDC' 카테고리의 다른 글
| [한글 번역] WWDC21 - Discover breakpoint improvements (0) | 2022.06.13 |
|---|---|
| [한글 번역] WWDC21 - Detect and diagnose memory issues (0) | 2022.06.11 |
| [한글 번역] WWDC22 - Improve app size and runtime performance (0) | 2022.06.10 |

댓글